The school summer holidays are well underway and you’re probably running out of your arsenal of ideas to keep your children’s screen time to a minimum. If you can’t quite face splashing out on another expensive excursion, try our thrifty, craft-based suggestions to keep the kids entertained. All use cheap, easy-to-source ingredients that you are likely to already have at home. Not only will they while away a few hours, but they’re also guaranteed to excite little minds and spark imaginations, encourage experimentation and problem-solving, and provide a sense of achievement at the end.
Pasta painting
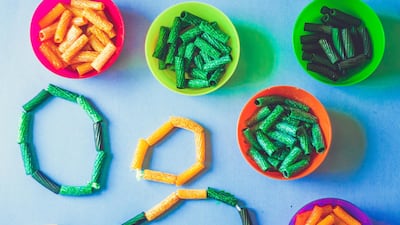
Colouring pasta to make jewellery, pictures or murals might not be a new suggestion, but the clever thing here is the method, which minimises mess while maximising the fun factor, ensuring it’s a winner with both adults and children.
The vinegar helps loosen the food colouring and ensures it coats the pasta fully and stays put once dry. Keeping everything contained in sealable plastic bags prevents kitchen surfaces from getting a colourful makeover, too. It also means that all the ingredients are non-toxic, which is especially pertinent if the little people getting involved have a tendency to put hands in mouths as a matter of course.
You can make the process more or less complicated based on age. Introduce young children to a couple of primary colours at a time and allow them to hone their fine motor skills by picking up and selecting the individual pieces. Older kids, meanwhile, can be encouraged to experiment with myriad shapes, shades and add-ons (glitter is particularly popular).
Recipe
Makes 300g coloured pasta (in three shades)
Ingredients
3tsp white vinegar
3 shades of food colouring
300g uncooked hollow pasta (penne, bucatini or macaroni)
3 sealable plastic bags
Glitter (optional)
Method
Line a couple of large baking trays with baking parchment. Put a teaspoon of vinegar in a small bowl, add two to three drops of the first food colouring, and mix well. Put one-third of the pasta in a sealable plastic bag, pour over the vinegar-food colouring mix, seal carefully and shake really well. Add a sprinkling of glitter (if using), reseal and continue to shake until the pasta is well coated. Tip out on to the prepared baking tray and leave to dry out for two to three hours, before using. Repeat twice more with the remaining pasta and colouring.
Frozen yogurt bark
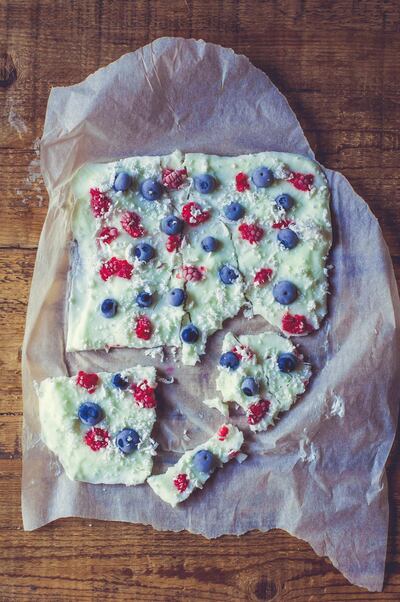
An edible kitchen project, making yogurt bark is fun, inexpensive and a little bit unusual, as well as being refreshing, endlessly customisable and healthy (cooking with children needn’t always mean baking cakes).
If your young ones want to be a bit more creative, instead of spreading the yogurt out in a single layer, little chefs can use a pastry brush to “paint” large yoghurt numbers or letters on to the baking paper instead. By all means experiment with different yoghurt flavours (full-fat tends to freeze best, though) and offer an array of toppings, so that everyone can pick and choose – think small pieces of kiwi, mango, blueberries, raspberries, shredded coconut, sultanas and dried apricots.
One more thing: yogurt bark needn’t just be for children. A grown-up version featuring chopped pistachios, shavings of dark chocolate and a dusting of orange zest makes a delicious alternative to a sugar-heavy dessert.
Berry and coconut yogurt bark recipe
Makes 1 sheet
Ingredients
500g full-fat natural or Greek-style yogurt
½tbsp honey, maple syrup or agave syrup (optional)
30g blueberries
30g raspberries, torn into pieces if large
2tbsp shredded coconut
Method
Line a large baking tray with baking paper. Tip the yogurt into a bowl, add the honey or syrup, and whisk together.
Spread the yogurt over the baking paper to a thickness of approximately 1cm to 1.5cm. Dot the blueberries and raspberries over the top, then scatter with the shredded coconut.
Transfer to the freezer for six hours. Once frozen solid, break into shards and either eat immediately or return to the freezer for later.
Salt dough
This kitchen craft requires just three budget-friendly ingredients – salt, plain flour and water – yet provides a good few hours of industrious entertainment, especially if you paint and glaze the salt-dough models once dry.
To make things more interesting for older children, encourage them to theme their creations and make paraphernalia associated with a favourite sport or hobby, or have a go at preparing hanging ornaments or decorations.
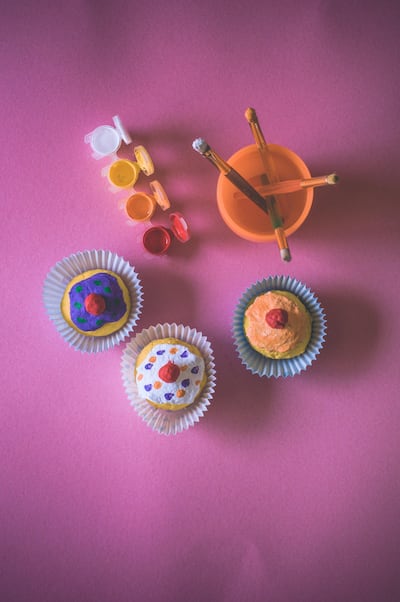
If they fancy trying something similar to the cupcakes pictured, the dough should
be formed into balls and topped with the “icing” while still raw, then cooked in cupcake cases.
The time it takes to bake the dough will depend on the size of the models. Objects similar to the cupcakes will need at least three hours in a low-heat oven – as a guide, the mixture should feel hard and dry when it’s ready. Leave to cool completely before painting.
Recipe
Makes 1 ball of dough
Ingredients
250g plain flour
125g table salt
125ml water
Cupcake cases (optional)
Method
Preheat the oven to its lowest setting. Fill a muffin tin with cupcake cases (if you are using them) or line a baking tray with baking paper. Put the flour and salt in a large bowl and mix well to combine. Make a well in the centre, pour in the water and continue to mix until you have a ball of dough that comes away from the sides. Turn out on to a lightly floured surface and knead briefly until smooth. You can then roll out the dough with a rolling pin and cut out numbers, letters and shapes or form into models, such as the cupcakes pictured above. Transfer to the oven and bake for three hours, or until the dough has dried out completely. Leave to cool before decorating.
Chia seed slime
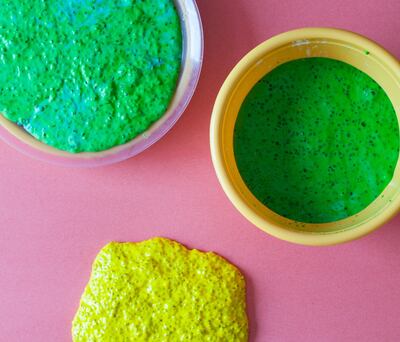
As any parent of young children is no doubt aware, brightly coloured, slippery, super-messy slime is all the rage right now. While playing with slime is a great sensory activity, there are concerns over the use of glue and borax in many DIY options. A no-cook combination of naturally gelatinous chia seeds and cornflour offers a solution to this issue, while still providing plenty of bumpy, textural, gloopy fun. It’s also far easier to clean up than glue-based versions and doesn’t stick anywhere near as hard or fast.
One thing to note with this recipe is the timing; the chia seeds require several hours soaking in the fridge, so the slime does need to be prepared ahead. Adding food dye and glitter is by no means essential, but it certainly ups the excitement factor.
Recipe
Ingredients
40g chia seeds
410ml water
Food colouring (optional)
Glitter (optional)
250g to 400g cornflour
Method
Put the chia seeds in a large bowl and cover with the water. Add a few drops of food colouring and a sprinkling of glitter (if using). Cover with cling film and transfer to the fridge for at least 12 hours. Gradually add the cornflour until the slime reaches the desired consistency. Store in the fridge between uses, adding water when necessary, and discard after a week.
Other crafty ideas to try:
Home-made lava lamps
Fill tall, empty water bottles or jars three-quarters full with vegetable oil, then add water, leaving a gap at the top. Add a few drops of food colouring then drop in four to six Alka-Seltzer tablets and watch the bubbling commence (the more Alka Seltzer added, the greater the number of bubbles).
Butterfly prints
Secure the middle of a clean, scrunched-together kitchen sponge with string or an elastic hair band to create a butterfly shape. Paint one side of the butterfly in different colours, then press together to coat the other side. Stamp, painted side down, on to paper or card to make a print, adding in extra details for the body and antennae, if you like.
Home-made body scrub
Put 300g granulated sugar and 200g fine salt in a large bowl and mix well. Add lemon, lime or orange zest, and a small handful of picked herbs (mint, basil, rosemary and thyme all work well). Stir in 50ml olive oil, then divide the mixture between clean, dry jars, and fasten with a lid.
___________________
Read more:
Summer up-skill: 5 new hobbies to try in the UAE
Gourmet food at 35,000 feet: ideas for creating your own on-board meals
How best to select, store and use fruit and vegetables
___________________


